Google recently announced a few changes to Google Classroom. Some of them are meant for admin-level people, but the thing I’m most excited about is an update for me, the teacher, and for our students. As you can tell from the title, this update allows the teacher to assign items to individual students. I posted a video going over all of the ins and outs below.
Here’s how to do it
If you are not a video person. Here is a breakdown of what you need to know.
Step 1
 To begin with, you will need to add an assignment just like you would normally do. Go down to the plus, “+,” sign on the bottom right of the screen and then click on “Creat Assignment.
Step 2

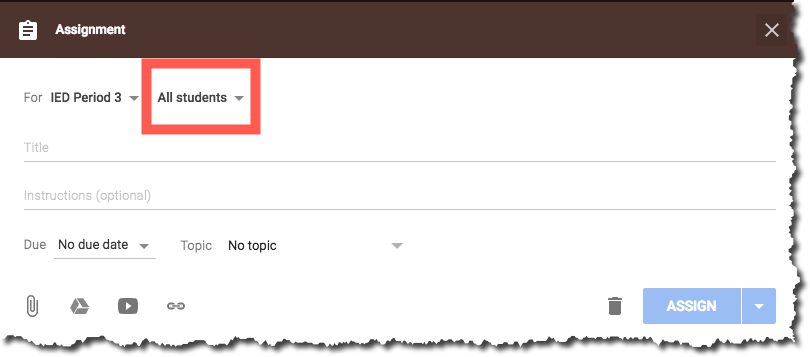
Click on the new “All Students” drop down.
Step 3

Deselect “All Students” and check the students that you want to assign something for. You can do this for as many or as few students as you wish. Once you are done, hit the “Assign” button like normal. You will notice that the number of students showing as not done will only reflect the number of students you selected.
Editing your selections
Luckily you can edit your selections easily and add additional students or subtract students from the assignment. To do this go to the edit menu.

From there you will see the number of students you assigned to the lesson. Click on the drop down and edit your selections.

And hit “Save.”
It’s as simple as that. Thanks Google!
Future suggestions
I would like to see Google add the ability to create groups of students so that I could quickly make multiple different assignments for mass numbers of students. Right now I have to go through and check each student. If I have 150 students, that means that I need to click 150 checkboxes. A grouping feature would allow me to select a group and have it assign to multiple students in that group, saving me a bit of time, effort, and stopping me from making as many mistakes.

Leave a Reply